If you are reading this, I am sure that you have read The Come Up’s article and hopefully you have read the No Film School DSLR Guide. Both of those are a good start but BMX requires some different techniques than the film festival style that No Film School is aimed at while the TCU page lacks a little on the helpful side of things. I did find the last step pretty funny though. This is going to be my take. It might not be the best way to do things. It might be the worst way but it is the way that I have found to work. This is also going to be geared toward the budget filmer. If you have more money to spend, there are a lot of great things to buy, but if you quit making videos after 3 months, they won’t be much help. Start simple and build from there.
List of ingredients:
Canon t2i/t3i/60d $200-$600
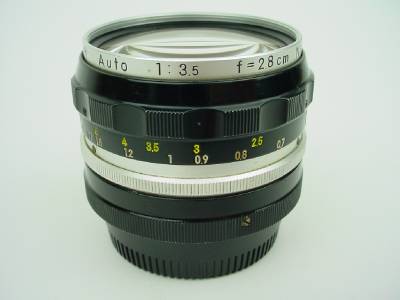
28mm f/2.8 vintage manual focus lens and adapter $20-$40
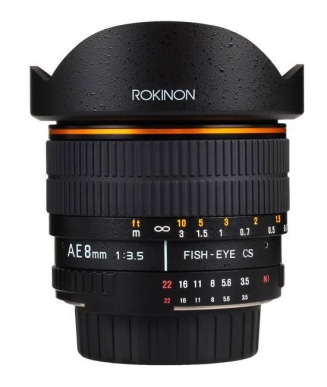
Rokinon/Bower/Samyang 8mm f/3.5 fisheye $175-$250
16-32 gigs of class 10 400x and up SD cards $20-$50
Extra Batteries from China $15
To start off you are going to need a camera. There are a few considerations, but when it comes to video, the Canon line has some essential features that Nikon does not introduce until their professional cameras. This means that if you are not in the professional market, go with Canon. So the Canon cameras of note are: T2i, T3i, 60D, 7D, 5D mark II. They are listed in performance as well as price. Funny how camera companies always make those two directly related. All the cameras I listed are or are about to be discontinued. This means that you need to buy them used. The good news is that it saves lots of money. I have seen t2i’s and t3i’s go for $150 on Craigslist. The reason that we are skipping the t4i/t5i/70d ect is that they introduce a touchscreen. I think they suck. Can you use one? Of course, but I find that you are paying more for features that are not improving the video. If you have one? No problem, use it. If you are buying? Save the cash and get a t3i. The t3i is the best in my opinion because it introduced the foldout LCD but was still non-touchscreen. thats just me. It is also way cheap. They all are though.
Now that you bought your t3i for a good price of $250 on craigslist, you are going to need a lens or two. Nope, that 18-55 kit lens will not work. Or the 70-300 lens that they included as a bonus. So what do you need? A nice manual focus vintage lens. This is a place where Canon gets extra points. Most other brand lenses can be adapted to Canon (Except for their own pre-EOS line, the FD lenses) so what are you looking for? A nice prime lens. Just like rib, the prime lenses are the best. Prime lenses do not zoom. They are stuck in their “prime” focal length. But they are faster. Like a cheetah. No, they let more light in. Faster (lower) apertures. Hop on ebay and see if you can dig up an old 24mm or 28mm Nikon, Pentax-K or Olympus mount lens. But shoot for an off-brand like vivitar, bower, J.C. Penny. Whatever. Here is the secrete. Sharp lenses are needed for photography. But that is shot at 18-30 megapixels. We are filming at 1080p. And that is 2.1 megapixels. So get a nice $25 lens, $8 for an adapter from china and we are set to go. Heck, for the price, you can get a 28mm, 35mm and a 50mm. Just make sure they are as fast as you can afford. So go with the f/2.8-f/1.8
After you get a nice little standard lens, it is time for the essential evil. The Fish. Yes. No. Not a fish, but his eye. So we can’t just go to petco and cop a nice little feeder goldfish?. We go back to ebay. Just search for 8mm 3.5. There are a bunch of brands that make it, but it is the same lens. Bower, Rokinon, Opteka (Although they call theirs a 6mm) Bell & Howell. Just go for whatever is the cheapest. Should be able to get one for about $175.
So now we have the pizza and the prime rib, it is time for some appetizers. Or accessories. Whatever you want to call them. A tripod, memory card, bag, camera grip, extra batteries, camera stabilizers, lights, snacks, soccer moms to drive all this stuff around ect.
There are a wide range of junk-food appetizers available from China that have made filmmaking very affordable. Things to look for: Some Lp-e8 batteries, a Grip to hold them and add some weight, maybe a glidecam once you get into shooting seriously.
Now we have our rig, there is something we need to do. Magic Lantern. The mythical Canon firmware hack that lets us use consumer cameras like they are professional tools. What you are going to want to learn about is the focus peaking, histogram and cleaner ISOs (160, 320, 640) for a start. There are so many features that they keep adding and you should really just mess around with all of them to see what works for you and what doesn’t.
So that wraps up the basic gear guide for now. Next time round we will cover something a little more fun like actually breaking the camera out and filming some clips. Look for something about cooking it all up in the future with an editing guide. Remember: Put them questions in the comments and I will be updating this page and the rest of the guides to keep it all recent and relevant. Now get out there and do some craigslistings. Find that mint t3i for $150.


Pingback: The New Direction | BMX Blast